Showing posts with label backstage. Show all posts

Sunday, 15 February 2015

Wet plate outdoors.

Finally, after a long, long break I took a few plates outside!
It feels great and I hope to do it often this year. 
These images were taken close to my house, so I didn't use a portable darkroom (just 'regular' one), but still, climbing down and up a steep hill and jumping through the river with heavy tripod and 4x5 camera, was quite an adventure (and a good exercise too). Here are the results and technical info:

''Shape'', 
4x5 ambrotype, Poe Boy Collodion, Toyo View, Schneider Apo Symmar 150mm @ f8:


''Glencree River'', 
4x5 ambrotype, Poe Boy Collodion, Toyo View, Schneider Apo Symmar 150mm @ f8:


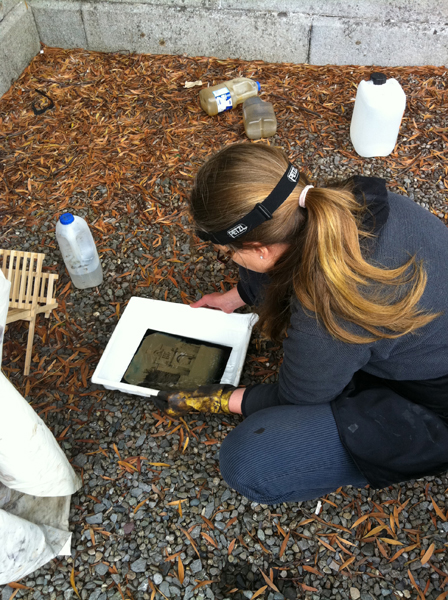
and backstage image of the location:


Wednesday, 14 September 2011

'Killruddery. Reflections on glass' - WPC exhibition

A while ago  I've started a documentary series about Killruddery Estate, what I've mentioned in one of my previous posts here.
This project is now ending with an exhibition of my works, opening today in the evening (15th Sept) in The Stable Studio, Killruddery House and Gardens, Bray, Co. Wicklow.
During the exhibition (18th Sep) I will also give a talk and present the technique of WPC.


Everything started with photographs I took in my friend's workshop (In Jamese's workshop), where I found beautiful pieces of statues waiting for renovation. These were Killruddery statues, and James told me about this place.
James is a wonderful man, he worked in Killruddery for quite a long time, has a big passion for this place and would tell you a lovely story about each subject from my photographs, giving them a much deeper sense.

When I visited The Gardens I thought it will be a really great idea to document them and that wet plate will be the most suitable technique. I knew that collaboration of WPC and historical surroundings of Killruddery House will create an interesting photographs, giving a sense of the long tradition of this beautiful place and giving an honour to its uniquity.

It was a hard but satisfactory work. It was a challenge. I think everything wrong what can happen when working with WPC on location, happened there, (not mentioning details like changeable Irish weather,rain and wind, forgotten parts of equipment, etc) but even then some of the photographs turned out very well and this is what I love about WPC, I really welcome all the uncernity and imperfections that it brings.(however still practising my patience)
I spent a few following Mondays/Tuesdays in Killruddery running around with my plates, here is the proof:


I am looking forward to today's evening, hope everything will go well and the visitors will enjoy the exhibition.

I would like to dedicate the exhibition  to James, thanking him for inspiring me to undertake the Killruddery project and also for all his help with building or repairing my photography equipment.


WPC exhibition photographs to follow...

Exhibition Dates:
16-20 Sep 2011, 9.30 a.m - 5 p.m
23-25 Sep 2011, 9.30 a.m - 5 p.m

Talk and presentation of the Technique:
18 Sep 2011, 2 p.m


The Stable Studio. Killruddery House and Gardens
Southern Cross
Co. Wicklow

Friday, 25 February 2011

Wetplate on location...


Two weeks ago, after checking the functionality of the darkbox in my garden, I decided to move with it a little bit further. However my first attempt of taking some collodions on location wasn't successful.

As my equipment is quite outstanding, although, in the place where I tried to take some pictures, photography isn't  forbidden, I wasn't allowed to take any, and I was told I need a written permission to do so! (while a person next to me took a dozen of digital photographs)

So I realised that generally it might be not that easy to take collodion photographs of what I want, what actually quite upset me....I was hoping I'll meet with an interest and support rather than unwillingness, well...

Anyway two days ago I've packed everything again and went just a little up the lane, where I'm living. There was plenty of showers and it was quite windy, so the conditions didn't allow me to take the most out of this adventure, but I've got a few :) :


Tuesday, 4 January 2011

Collodion process - backstage

Darkroom set up :)

So this is my bathroom - darkroom set up.
At the end I decided to use a plastic tray for silver bath, instead of the glass tank, which I've build, as I mixed a very small amount of chemicals - just to check if everything is working fine. (For my glass tank I'd need to use the whole amount of the silver nitrate, I have at the moment). 
I have to admit that  this option (tray) suits me well. 

I poured the developer directly on the glass gathering the surplus in the red tray. I filtered the used developer and pour it into a separate glass bottle,( it looks very dirty, however I might reuse it next time, and check if it's working)

I find the developing is the hardest part of the process. It needs a lot of practice. It should be done with one, smooth move. The liquid should stay on the plate and be in a constant move at the same time. The area not covered with the developer will stay as a black hole, like these:


It is quite a typical reaction, that once you notice the 'hole', you want to pour more developer in this place, but it doesn't work. It won't cover it well and - instead the excess will flow around the hole and wash the image off: 


After the whole day of preparation of the chemistry and plates I managed to do these 2, bad, outdoor shots only, before the sunset. I was very upset with the results of developing.
I didn't have such a problems during the workshop, so started to wonder if this is connected to the excitement, that finally I’m doing the collodion on my own, or there is an issue with the chemistry. But decided to give it one more try and set up an indoor portrait shot.


I was very careful this time and the same result after developing the 3rd plate made me to have a look to 'a guide', to check, what could be wrong.
So, off course  - I forgot to filter the developer! My mistake. But I also decided to add more alcohol to make it's consistence closer to silver bath's consistence and .... it helped!


Now, I can handle this amount of imperfections (but not the holes of half size of the photo :)!

....And the final shot of this session (already published, still with the hole, but I guess mixing a bigger amount of chemicals will allow me to be more presize with the ratio..;)


Time to do some proper collodions!


Monday, 20 December 2010

Collodion process preparation

Finally, after settling down in my new house in Glencree, I managed to put together some bits and pieces in regards to wet plate collodion process preparation. There is still a few small packages that I am waiting for, but generally I’ve got most of the staff and hoping to do my first mix and test shots soon.

1. Camera.
I am going to use contemporary TOYO 4x5 camera for the beginning, with Schneider Apo Symmar lens. I will have to be very careful with any chemicals dripping and clean the camera after each use, otherwise it will corrode  (and I want to use it for film as well)
My dreamy plan is to construct a  wooden camera (8x10) one day J

2. Glass plate holder.
Probably not a great idea – I transformed plastic Fidelity holder. What devides the two sides of the holder is metal plate. It was very difficult to get rid of it in precise way. And my 2mm glass sheets have to be slightly shorter then 5inch to fit the holder. Well, we’ll see, curious if it’s light tight.
I'm waiting for a set of timber holders to transform one of them.


What is not well visible on these photos - on one side I cut off the piece which normally devides dark slide and film, so the glass sits on the edges of what's left after the metal plate.


3. Chemistry.
I’ve got everything for ‘poor boy’ formula (the least toxic one, and cheapest, I guess). I’m afraid to open them J (oh, I don’t have anything for varnishing yet)


4.Glass plates, 2mm, just a few for the beginning.

5.I did a prototype of silver bath tank and dipper from glass. I think I should do it slightly thinner to save the amount of  silver nitrate needed, and I should glue it with transparent silicon to make it look nicer :) .Just need to glue the two triangles on one side or I'll do a timber support, to get the required angle. At the moment it takes 300ml.


At a later stage I'll think about some timber light tight box cover for the tank. For the beggining I'll be using it with safe light.


6. I’m awaiting small digital scale, hope will get it before xmas, and then  just measure the right amount of chemicals, mix them, allow the collodion to mature and START!

Wish me luck..