handmade photographica
alternative photography diary
Sunday, 5 July 2015
Tuesday, 7 April 2015
Saturday, 28 February 2015
Wet plate imperfections (2). Dirty glass.
Long, long time ago (2 years ago) I wrote a post about collodion imperfections, concentrating on silver stains on collodion plates: LINK. This was meant to be a start of a series of posts about collodion artefacts or problems, showing their examples.
Then I thought, that the simple examples, that I can show and write about with confidence, are probably too obvious for collodion photographers and I've abandoned the idea.
However I've got a feedback from my students and people who are only starting with the process and would like to see even these 'obvious', (not for everyone), examples of fails. I hope more experienced collodionist will contribute to these examples, showing their problems, solutions and comments.
So here we go - with dirty glass problems.
Those of you, who has put their hands on the process, know how crucial it is to have a perfectly clean glass and how much effort it can take. Simply a dirty glass can cause peeling off the collodion layer in worse case scenario and offer plenty of marks and stains, as a better option.
Glass can be cleaned in many ways. It is recommended to implement at least two different ways of cleaning.
My way of cleaning glass? Well, enough to say, that this part of the process is not my favourite...
When I use collodion formulas with big content of alcohol, (which causes, that collodion film sticks better to glass),usually Poe Boy, I am cleaning glass with warm water with washing liquid first and, when dry - with alcohol.
When I have a bigger batch to clean, I simply do the first step in the dishwasher. Then I wipe each plate individually with alcohol, applied with cotton pad and rub the plate well. If not absolutely happy after these 2 steps and breath test, I rub and polish more, with clean flannel.
When I use collodion mix, which takes extra ether I sub the edges with albumen (1 white of egg + 250 ml of distilled water). Collodion sticks to it very well.
I used to use Rottenstone or Whiting, (as a second step, after washing with water and washing liquid) but it took much more effort and sometimes this method was giving me cleaning marks, although the plate seemed to be perfectly clean. Sometimes it happened even after adding 3rd step and wiping the plate with an alcohol at the end.
I gave it up in favour of the methods described above, which work for me perfectly.
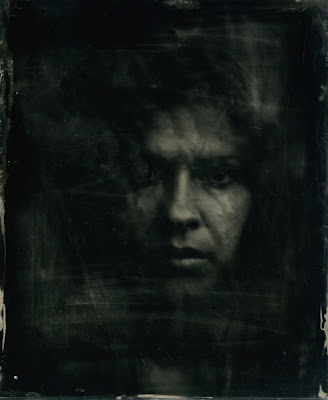
Here are the examples of plates with cleaning marks (residue of Rottenstone) and peeling of edges.
These examples can give an idea on how you can manipulate the process, and create scratches and marks on purpose, (if you want to).
Sunday, 15 February 2015
Wet plate outdoors.
Finally, after a long, long break I took a few plates outside!
It feels great and I hope to do it often this year.
These images were taken close to my house, so I didn't use a portable darkroom (just 'regular' one), but still, climbing down and up a steep hill and jumping through the river with heavy tripod and 4x5 camera, was quite an adventure (and a good exercise too). Here are the results and technical info:
''Shape'',
4x5 ambrotype, Poe Boy Collodion, Toyo View, Schneider Apo Symmar 150mm @ f8:
''Glencree River'',
4x5 ambrotype, Poe Boy Collodion, Toyo View, Schneider Apo Symmar 150mm @ f8:
and backstage image of the location:
Wednesday, 28 January 2015
Subscribe to:
Comments (Atom)


